Rebuilding The Core
The rehabilitation process for eliminating any kind of pain from an injury requires a three stage approach.
Eliminate the cause of the pain in order to decrease symptoms and provide an optimal environment to initiate the body's natural healing process
Address the body’s “weak links” that led to the pain in the first place. This will include a well rounded approach of starting back-friendly core stability work like the “McGill Big 3,” mobility/flexibility exercises for restricted joints and retraining poor movement patterns.
Correct training stresses and movement that help facilitate the healing process without placing excessive load on the spine that re-create symptoms
You will eventually have to progress the core training into the later stage of rehabilitation to meet the demands of higher intensity exercise and the increased volume of athletic training. There isn’t one specific exercise that equally stresses all of the muscles of the core that surround the spine or places the same physical demand on your body. Therefore, we need to create a training program that requires sufficient stress to build optimal core stability through multiple plane of motion and movement patterns.
Push
Pull
Carry
Anti-Rotation
Training in each of these planes will help rebuild your core by forcing you to identify and address “weak links” that often go unnoticed in performance training. A good example would be a powerlifter who will perform exercises that will fall into the lift (squat), pull (deadlift) and push (bench) categories. However, if they never performs any loaded carry exercises (farmers walk), they essentially leave their body open to potential injury as they fail to stimulate core stability in the frontal (forward and backward) plane of motion.
When returning from a back injury, we must take a logical and planned approach. Selecting exercises that help facilitate the healing process without placing excessive load on the spine that re-create symptoms and fairs up the injury. Performing anti-rotation exercises before one can successfully squat with light weight can often have negative consequences. Exercises that create a rotational force on the body (such as: pallof press) can place upwards of four times as much compression on the spine compared to the same weight that attempts to create a flexion/extension force.9
The following is a logical progression of stability exercises that stress the body first through a sagittal plane (flexion/extension torque), then a frontal plane (lateral torque) and finally through a transverse plane (torsional torque). While there is no such thing as an ideal set of exercises for any rehabilitation program, the following exercises can be a good starting point for creating a plan that best suits your body type and performance requirements.
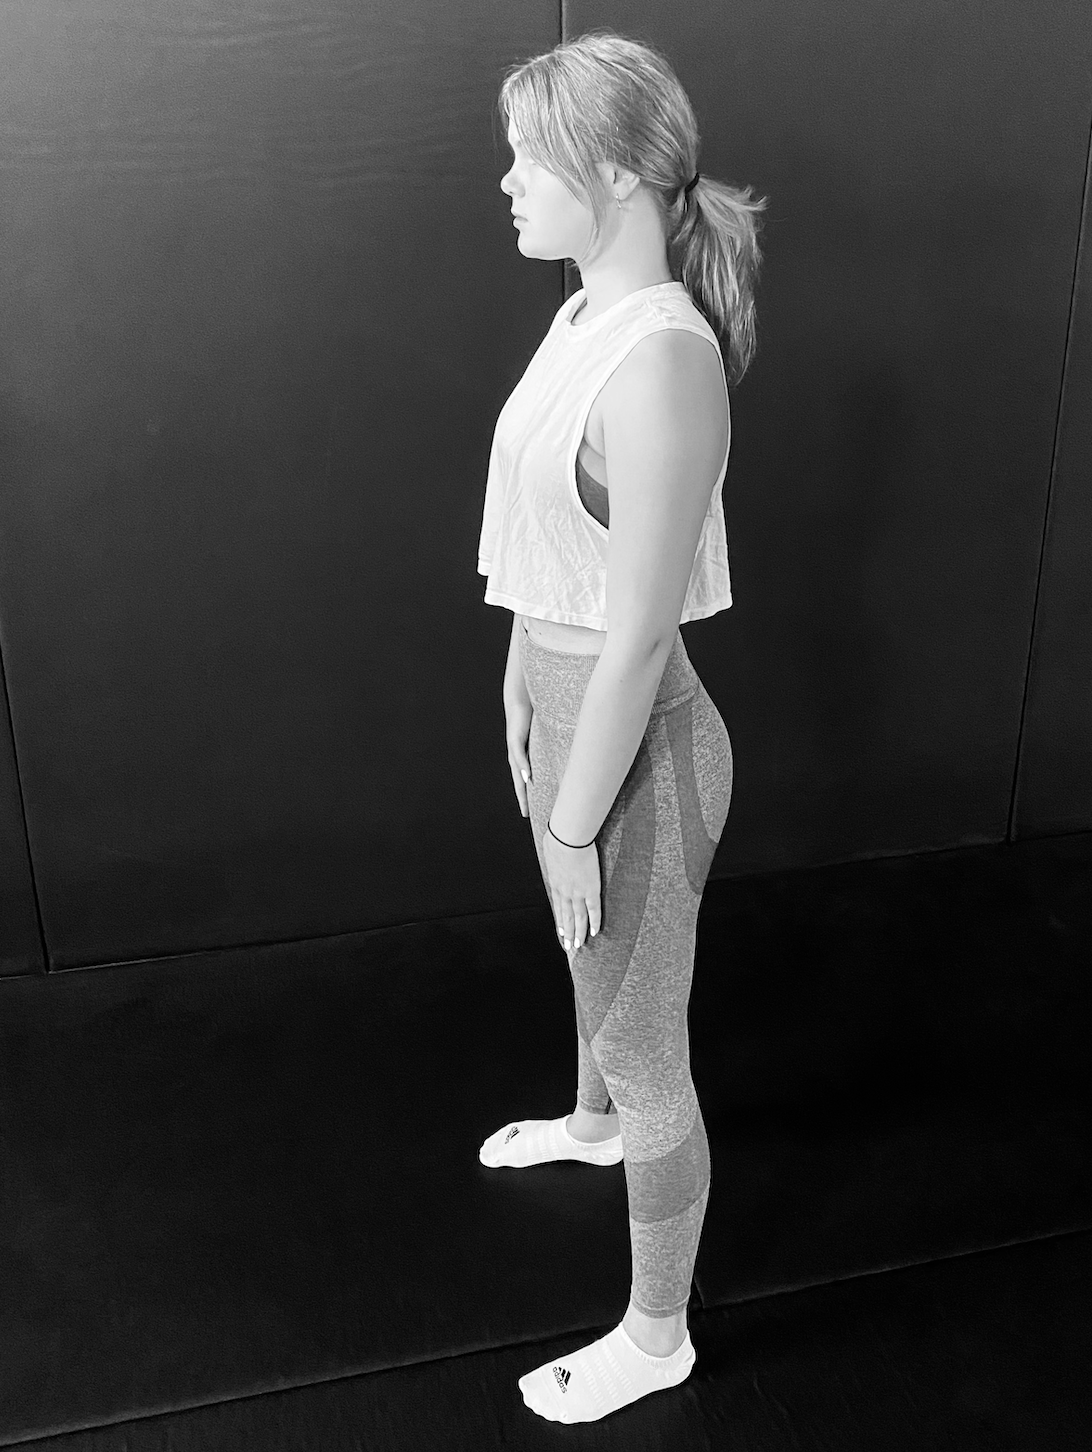
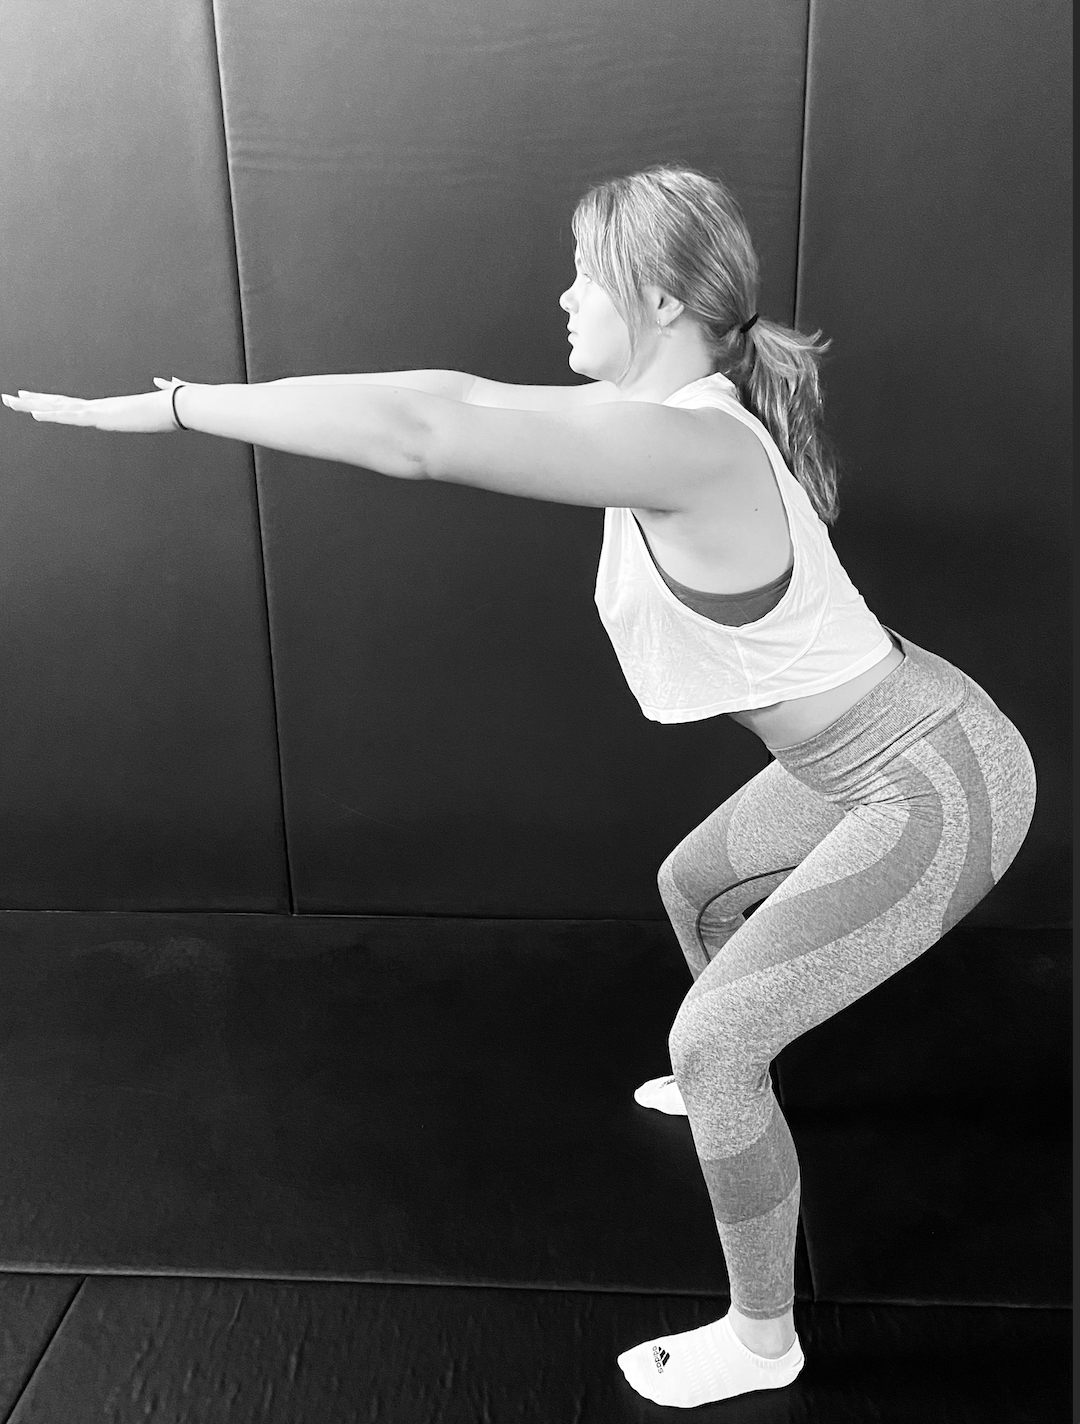
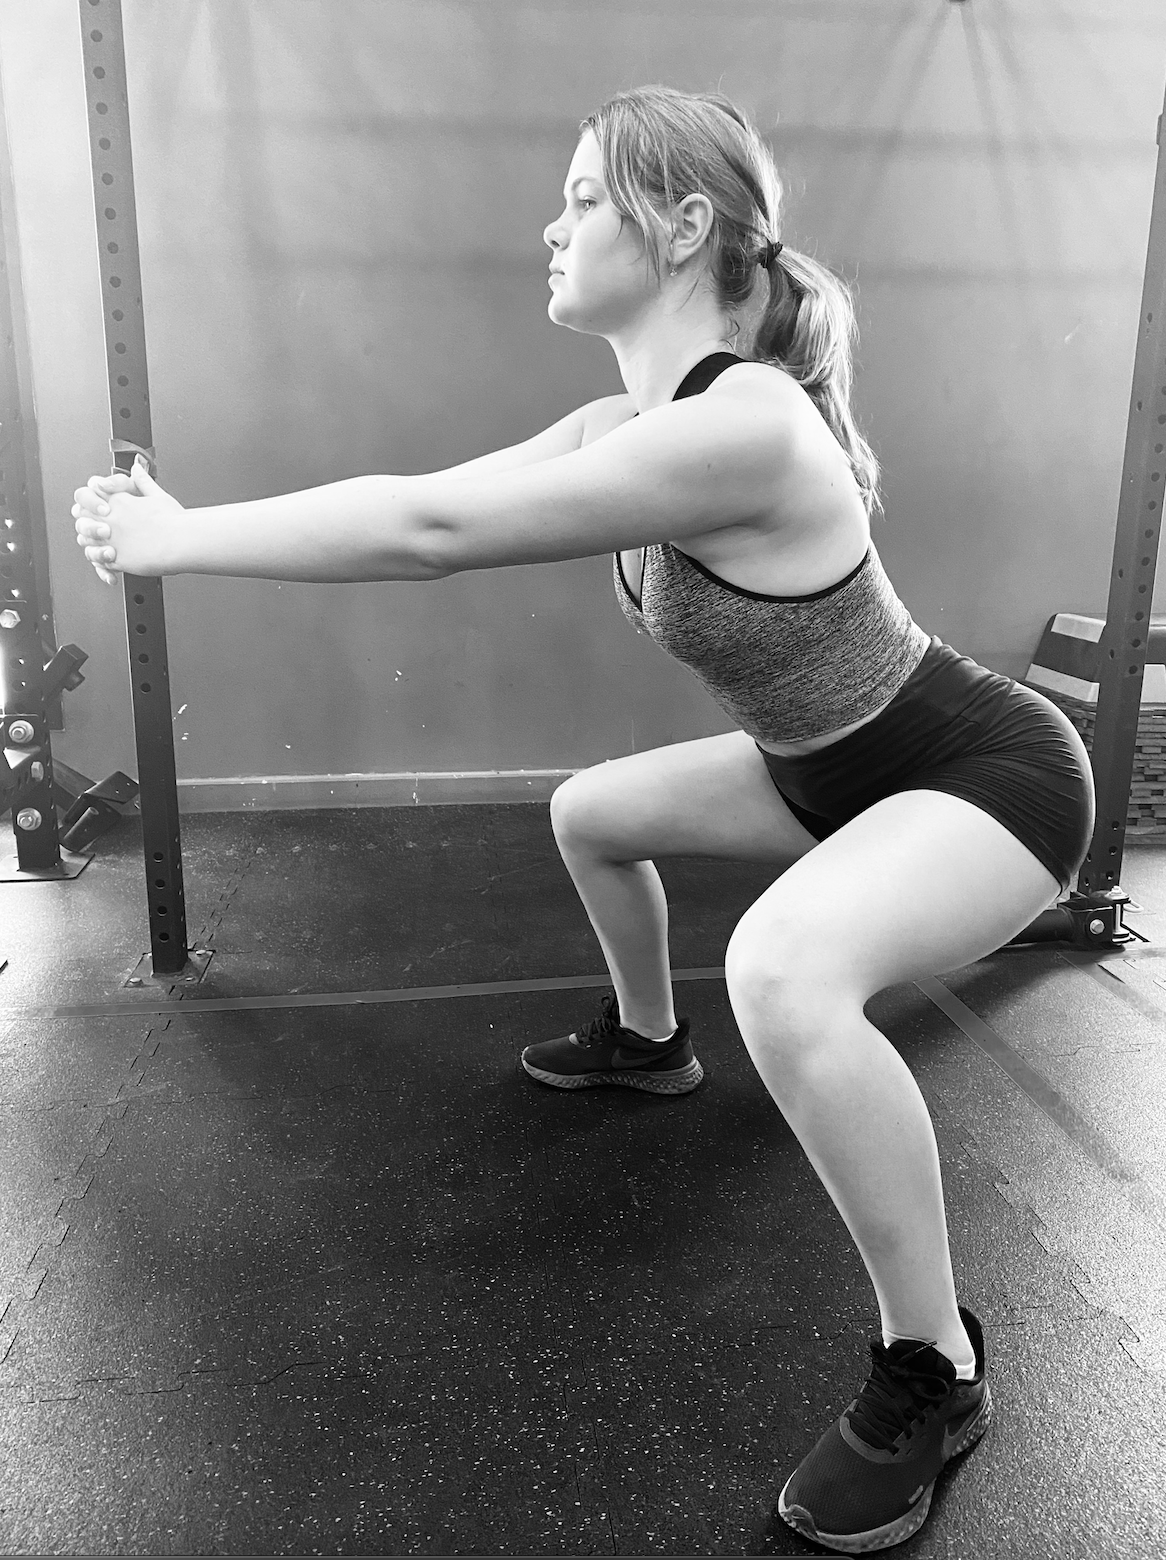
Squat
Once you can perform a hip hinge pain free, it’s time to start rebuilding the squat. Start by performing a bodyweight squat and increase depth as you are able to do so without pain. Depending on the severity of your injury, it may take a few weeks until you are able to regain a full depth bodyweight squat without symptoms. Once you can do so, it is then time to increase the load.

The position of the load effects your cents of gravity and the amount of weight being lifted will effect how much force is placed on the spine.
For example, performing a goblet squat with a 14 kg kettlebell held by your chest will place less force on your spine than a 60 kg front squat. In the same manner, a 60 kg front squat will create less torque on the lumbar spine compared to the same weight in a back squat. The more vertical torso assumed during the front squat in order to stay balanced provides a smaller moment arm (distance from the vertical line of gravity pulling down on the barbell to the joints of the lumbar spine) when compared to the relatively more inclined torso of the back squat.1-2
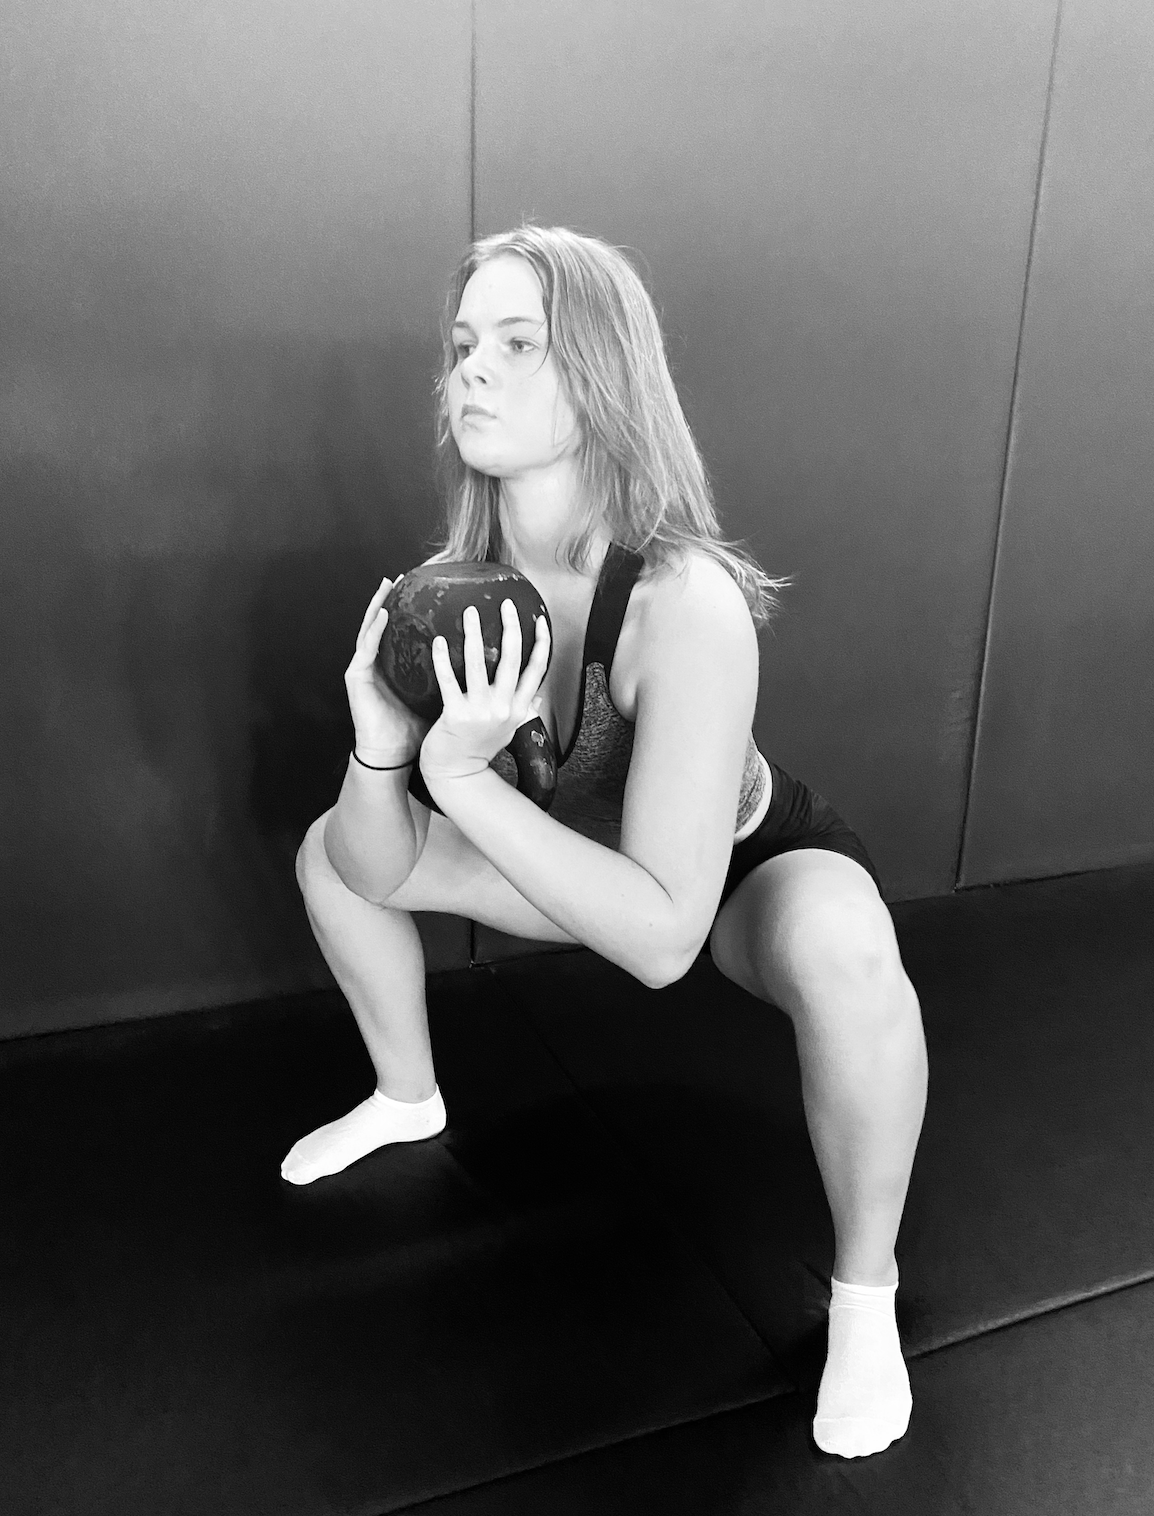
The goblet squat is an ideal starting movement, before progressing to a front squat and eventually the back squat. Be aware how fast you progress through each movement pattern and how much load you choose to lift. If this process is rushed and you return to lifting heavy weight too fast it can easily flair the injury back up.
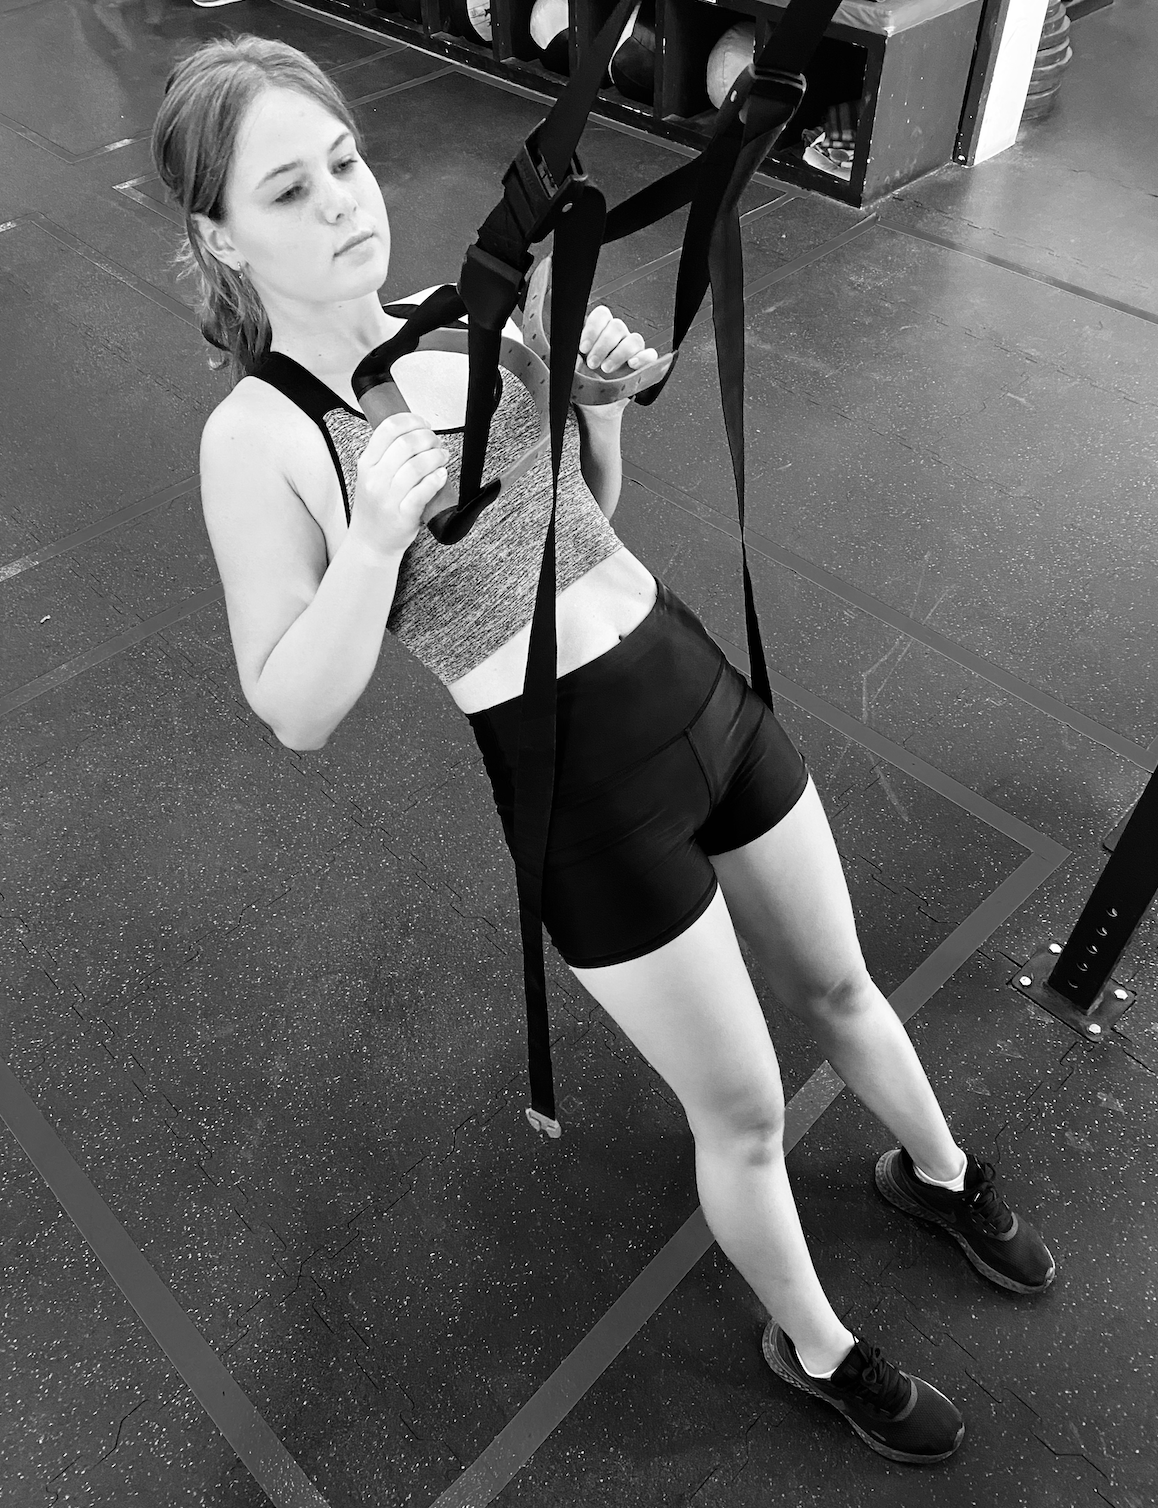
Inverted Row: Pull
The inverted row (performed with a TRX or gymnastic rings) has been shown in research to elicit a high amount of upper and mid back muscular activation while placing minimal stress on the spine.3 This makes this variation of the row a great exercise in the early stages of rehabilitation from a back injury.
As you perform the row, ensure your back remains in a neutral braced position throughout the entire movement, DON’T HYPEREXTEND YOUR BACK! As this exercise becomes easier to perform, walk your feet down and angle your body closer to the ground. The end goal should be to assume a parallel position to the ground with your feet elevated on a bench or box.

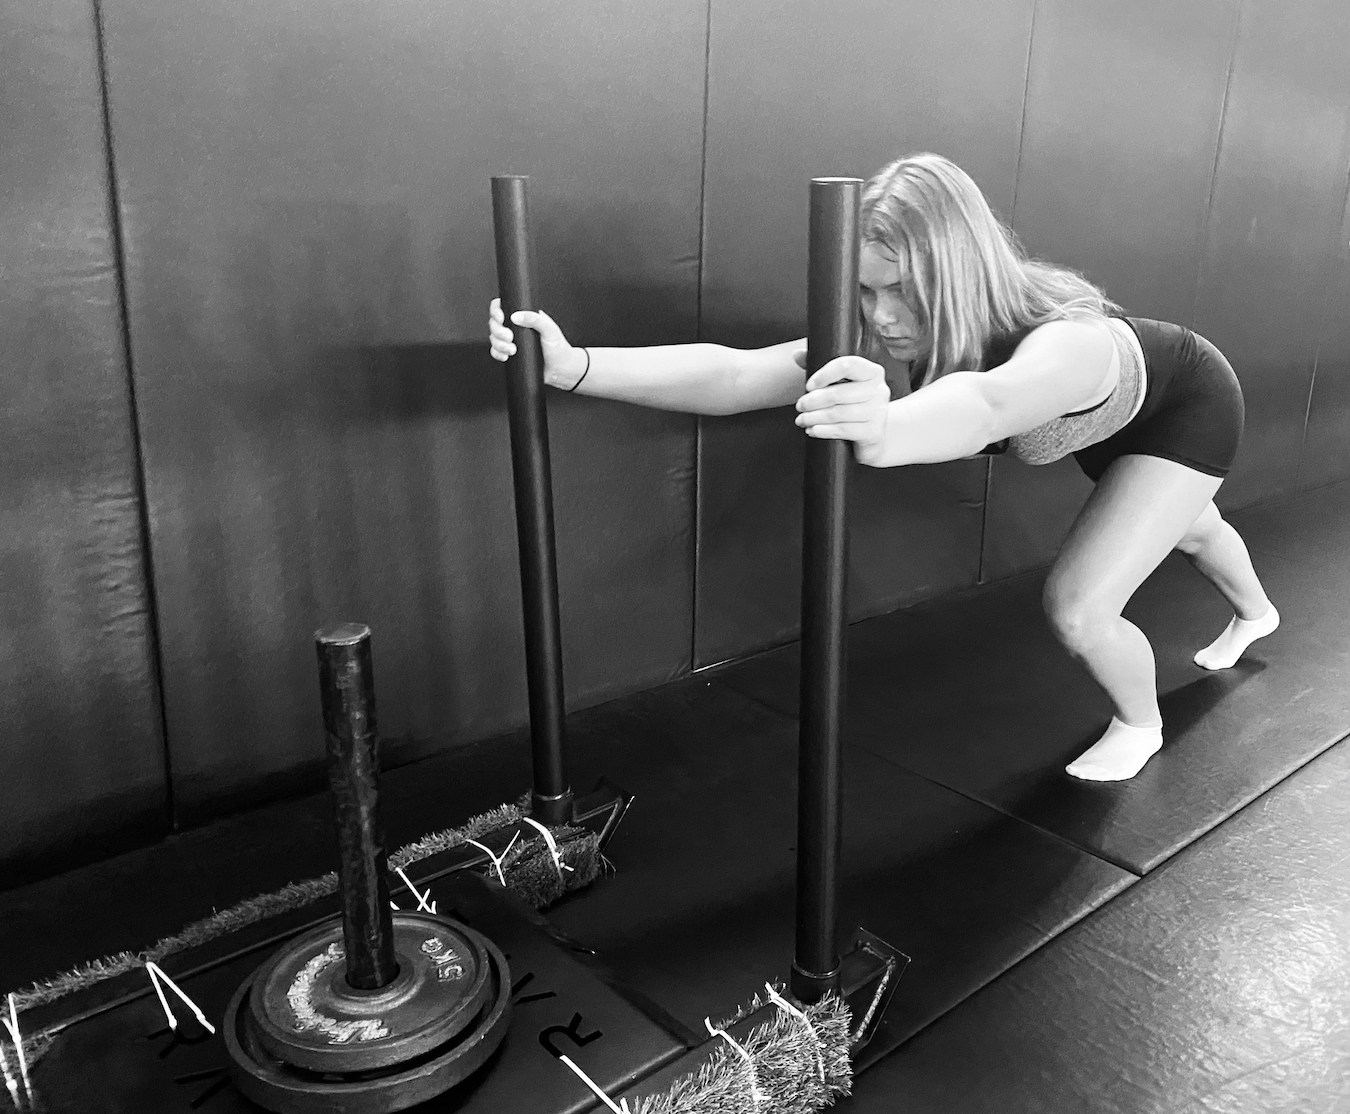
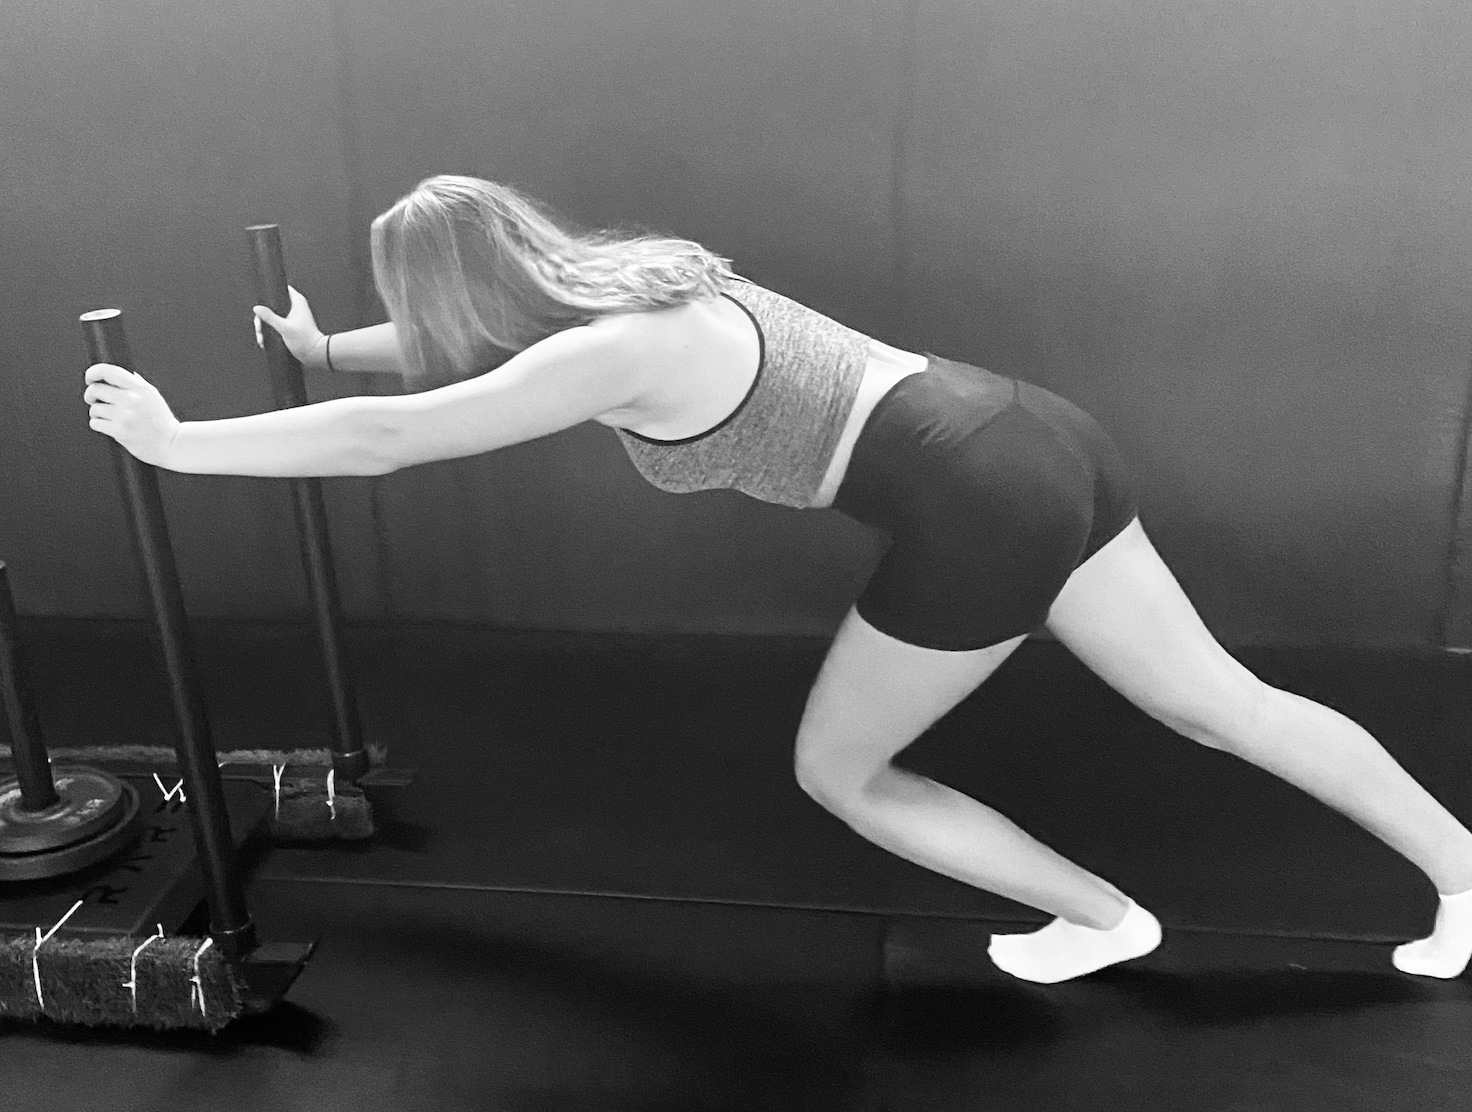
Sled Push: Push
Pushing a weighted sled requires an athlete to generate tremendous force with the legs and transfer it through a stiffened core into the arms and eventually the sled. If you are unable to create sufficient stability the spine will move out of the ideal neutral position causing energy that would otherwise be transferred into the moving sled to “leak energy.”
Start with your hands high on the sled poles. Before any movement occurs, grip the sled poles as hard as you can and drive your feet into the ground. Along with bracing your core, these actions will help create necessary spinal stiffness to help you drive the sled with incredible power while keeping your back safe.
Suitcase Cary
Almost all lifts occur in the sagittal plane of motion (the barbell moves in a relatively vertical path with both feet firmly planted on the ground). Because of this athletes can develop weaknesses in creating strength and stability in the other planes of motion.
A good example of this is with the lateral musculatures of the core (quadratus lumborum (QL) and obliques) are not sufficiently challenged during the classic lifts of the deadlift or squat and even the more dynamic movement of the Olympic snatch. If an athlete cannot sufficiently activate these muscles to stabilise the body through different planes of motion they leave their body open to potential injury.
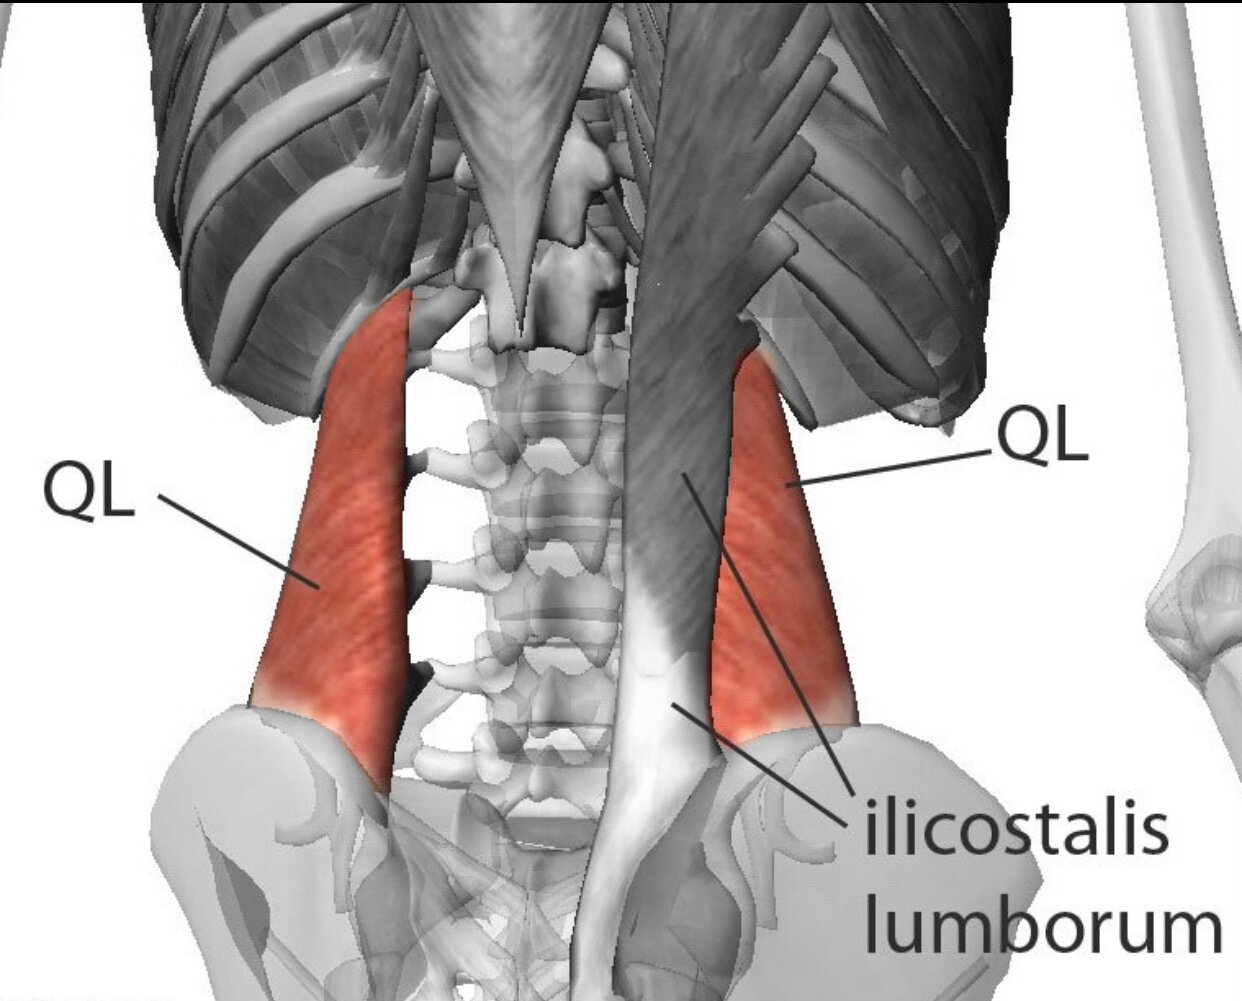
Quadratus Lumborum (QL)
Take for instance these two examples.
During a heavy squat an athlete must first walk the barbell out of the rack a few steps before setting their stance.
Olympic weightlifter may stumble one foot forward quickly in an effort to recover an off balanced lift.
In each case, every step forward or backwards an athlete takes moves the body through the frontal plane of motion.
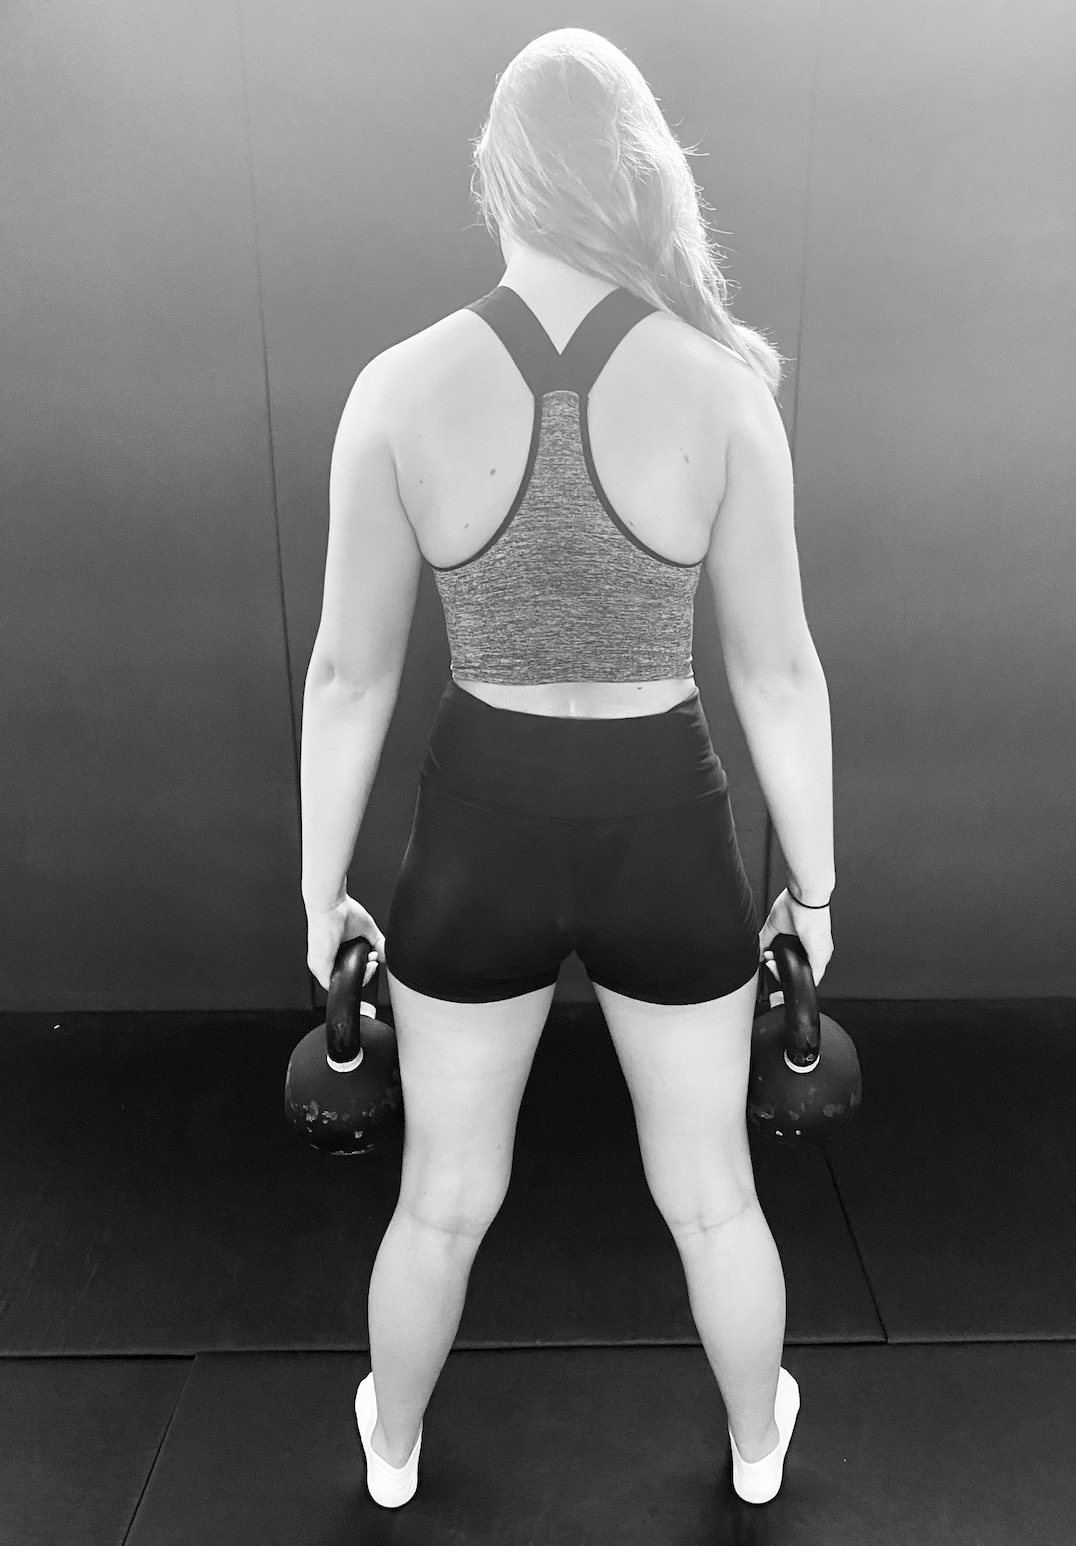
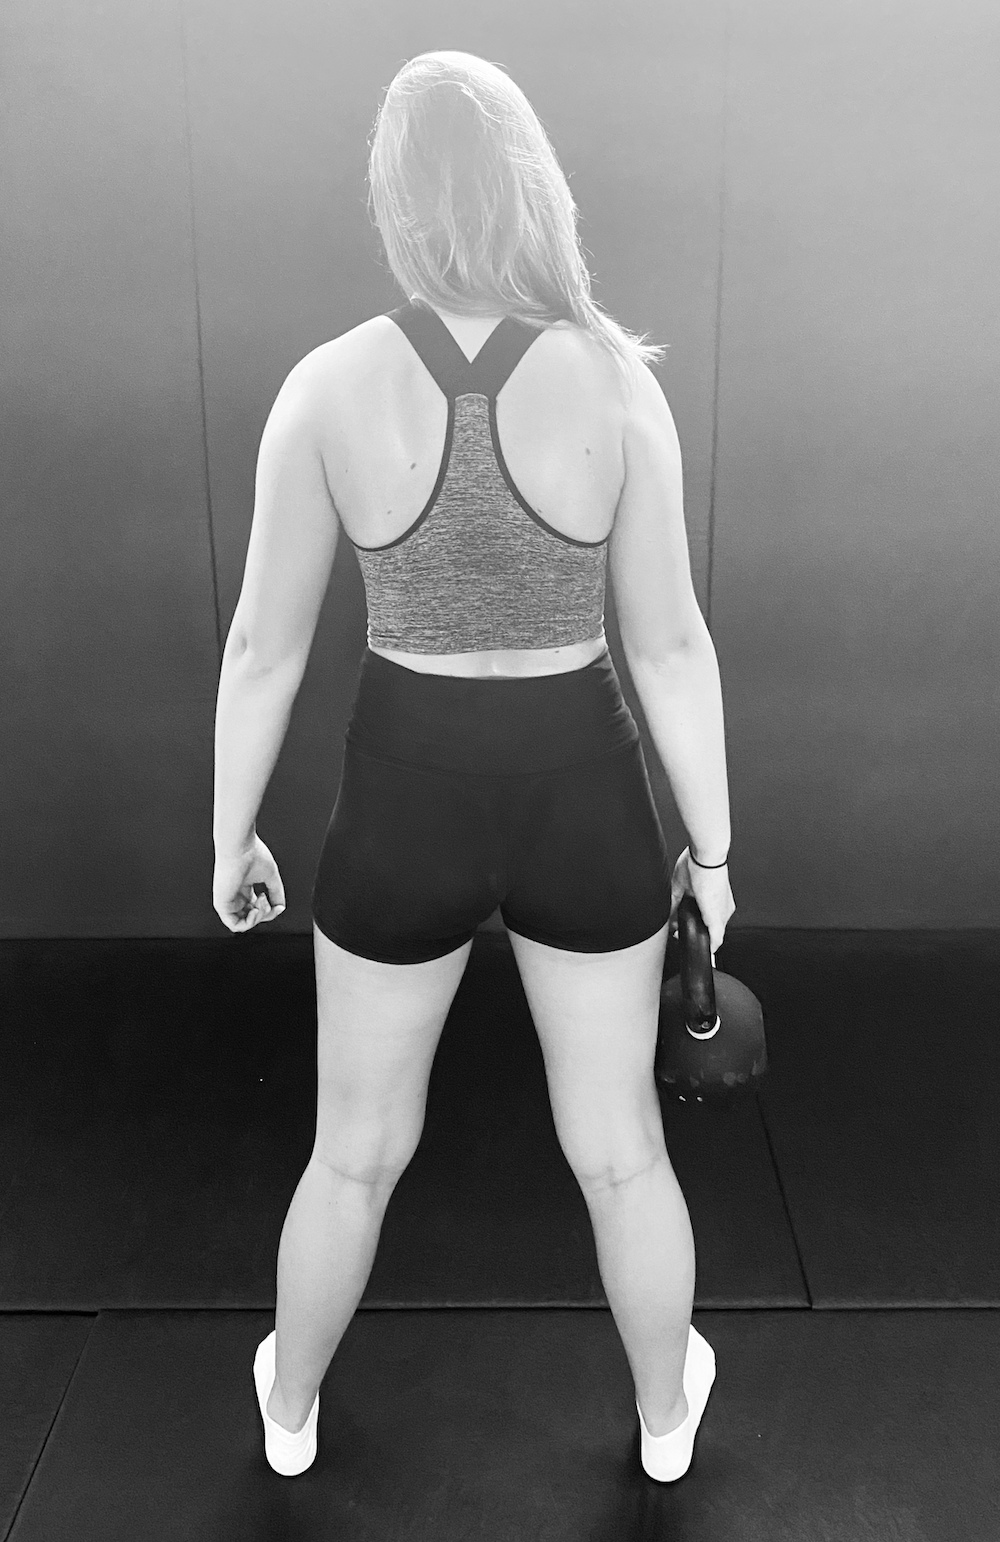
The suitcase carry challenges the core in the frontal plane and will help address this common imbalance for many athletes.

Grab a light weight kettlebell or dumbbell (8-12 kg to start) with one hand and hold it on your side. Brace your core and ‘squeeze your arm to your side’ or ‘pull your tricep back’ to activate your lats (use the cue for creating upper body tension when setting up your deadlift of “make your arm pits disappear”). Grip the kettlebell handle as hard as you can before you start. As you walk, concentrate on limiting any side to side lean of your torso
Performing a suitcase carry with the weight in one hand is significantly harder and a greater challenge to your core than performing the exercise with weight in both hands. When you hold 2 kettlebells it balances like a seesaw and reduces the lateral stress on the core. Research has shown that carrying double the weight in each hand (using two 30kg kettlebells) places significantly less compression on your spine than when carrying a single 30kg kettlebell in one hand.6 This is because your body is being challenged to a greater degree to stabilise the uneven forces moving up your spine by holding the weight in one arm.
Pallof Press: Anti-rotation
The lateral banded press or “Pallof Press” challenges your body’s ability to resist a rotational motion. This provides a unique test for strength athletes who rarely encounter rotational forces during normal training with the barbell.
Begin in a standing position with your hands close to your stomach and holding a band/cable. The attachment for the band should be perpendicular to your side. Brace your core and push your hands away from your body (hold this position for 5 seconds without allowing your body to twist).
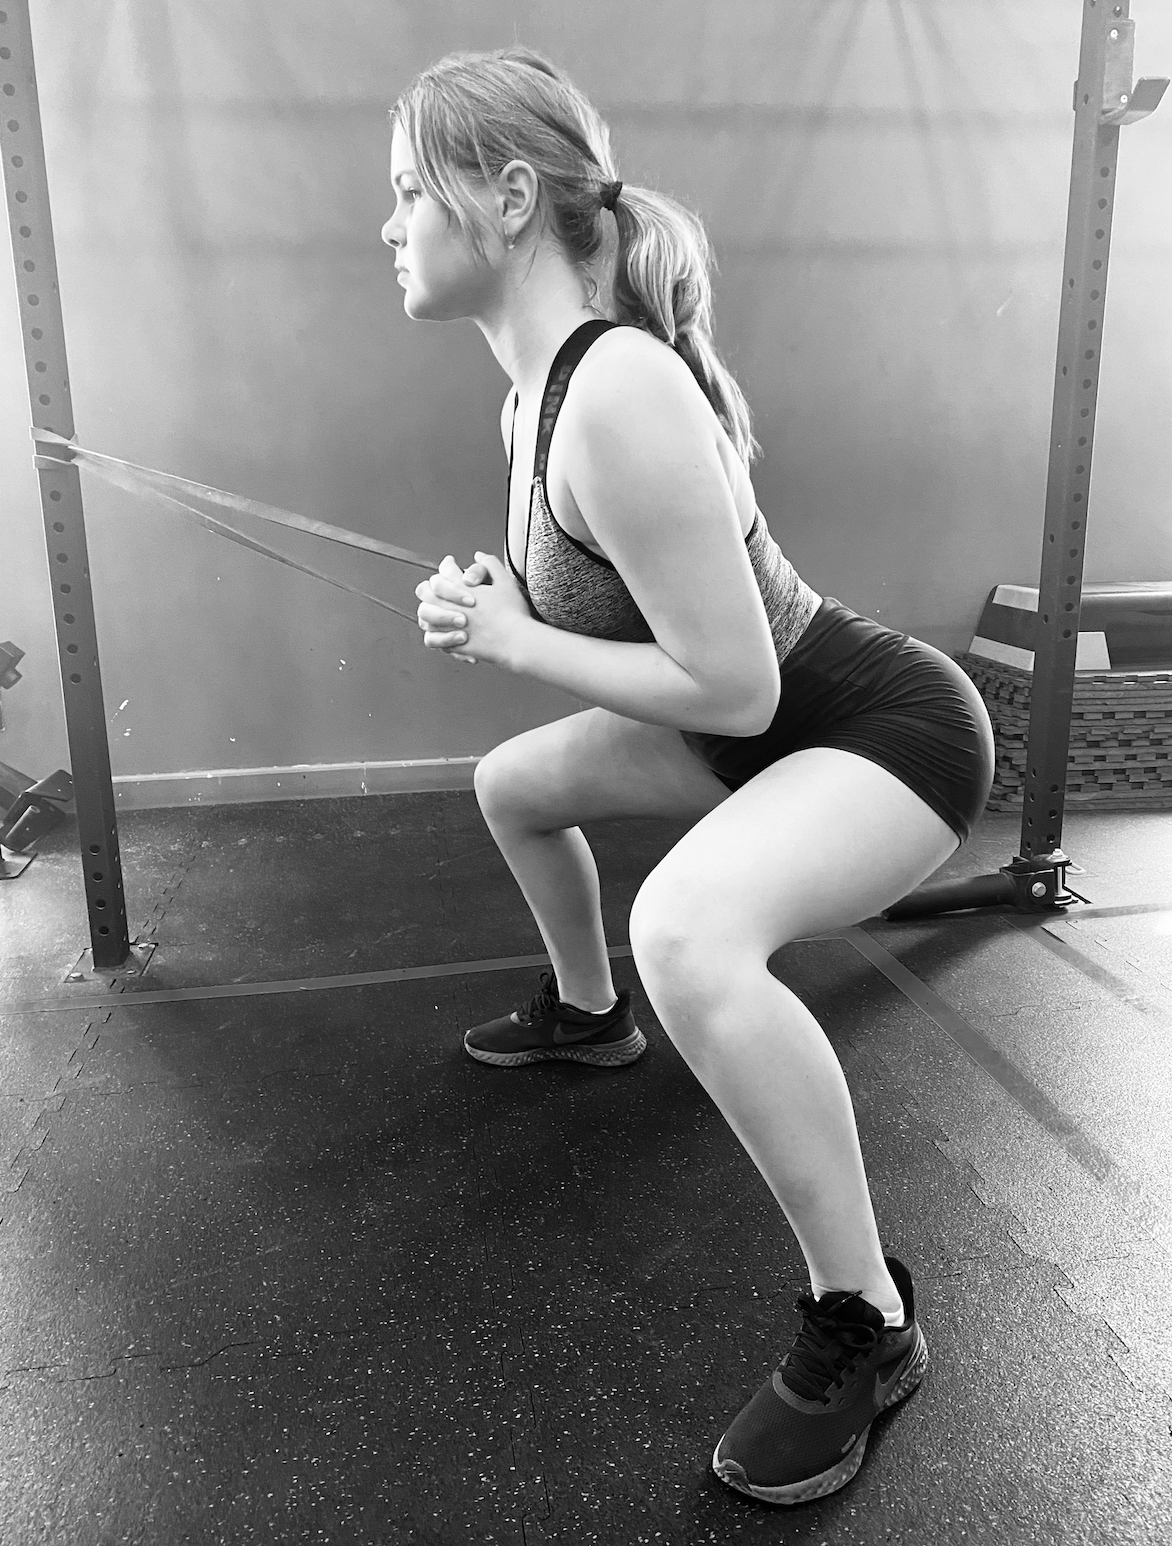
You can perform this exercise in different positions (half kneeling or tall kneeling), by adding a lift after the initial press and hold, or even perform it in conjunction with a squat. After you perform your first press, squat down a few inches, pause and press again. You can do this again one or two more times until you reach the bottom of your squat.
One Armed Row
At first glance most people would classify the one armed row (performed with a resistance band or cable machine) as a shoulder stability exercise to emphasise the strength of the upper back and posterior shoulder musculature. While this is correct, it also provides an excellent challenge to the athlete as an anti-twisting or rotation core stability exercise.3
Stand facing towards a cable machine or attach a band around a rig. Perform a row with one arm while maintaining a neutral spine. Don’t allow your body to twist at all. After a two second hold, extend your arm back to the start position. You can perform this row in a number of different positions (such as in a lunge or kneeling).
Rebuilding the Core to Perform
Once you are pain free and have returned to your prior level of training, you must continue to maintain your core stability. In order to do this you should perform the McGill Big 3 and other core stability exercises on a weekly basis. There is no “right or wrong” when it comes to choosing which of the exercises to include, but It’s recommend you incorporate those that challenge your body in different planes of motion such as Pallof Press for Anti-rotation stability and suitcase carry for frontal plane stability.
Bibliography
Fenwick CM, Brown SH, McGill SM. Comparison of different rowing exercises: trunk muscular activation and lumbar spine motion, load, and stiffness. J Strength Cond Res. 2009;23(2):350-8
Siff, MC and Verkoshansky, YV. Supertraining. Denver, Colorado: Supertraining International, 1999. pp. 1–3, 88–90.
McGill SM, Marshall L, Anderson J. Low back loads while walking and carrying: comparing the load carried in one hand or in both hands. Ergonomics. 2013;56(2):293-302
Nelson-Wong E, Alex B, Csepe D, Lancaster D, Callaghan JP. Altered muscle recruitment during extension from trunk flexion in low back pain developers. Clin Biomech. 2012;27(10):994-8
Cholewicki J, McGill SM, Norman RW. Lumbar spine loads during the lifting of extremely heavy weights. Medicine and Science In Sports and Exercise. 1991;23(10):1179—1186
McGill SM. Ultimate Back Fitness and Performance. 5th ed. Gravenhurst, Ontario: Backfitpro Inc., 2017.
Enoka, RM. The pull in Olympic weightlifting. Med Sci Sports. 1979;11:131-137.